This post contains everything I did to put up a static website on aws, using S3, Route53, CloudFront, and Certificate Manager.
I wanted to learn a little about aws, so I tried setting up a static website. Below is everything I did (took me a few tries). The static test website is here, if you are interested (the content is for a project my wife is working on). NOTE: I didn’t put much effort into making the site look pretty. :(
I mostly used a document I bought from Kyle Galbraith (I think there was a half-off sale at one point). I bought it in 2019, but just now pushed through most of it and set up a site. It was worth it for me (there’s lots more in the document than just setting up a static website), but I’m sure you can find other blogs and articles that are free if you want.
I used Jekyll for the static site.
docs I followed
- Jekyll Docs
- Kyle Galbraith’s Learn AWS By Using It
- Marcos Lombog’s Build and Deploy a Jekyll Website
- amazon s3 developer guide
overview
- signed up for an aws account
- set up two-factor auth
- set up second non-root IAM account
- set up two-factor auth for the IAM account
- enabled billing alerts, set an alarm ($1)
- installed awscli on my local workstation (running ubuntu)
- using Route53, bought a domain (jmktest.net) for $11/year
- using S3, made the www.jmktest.net bucket
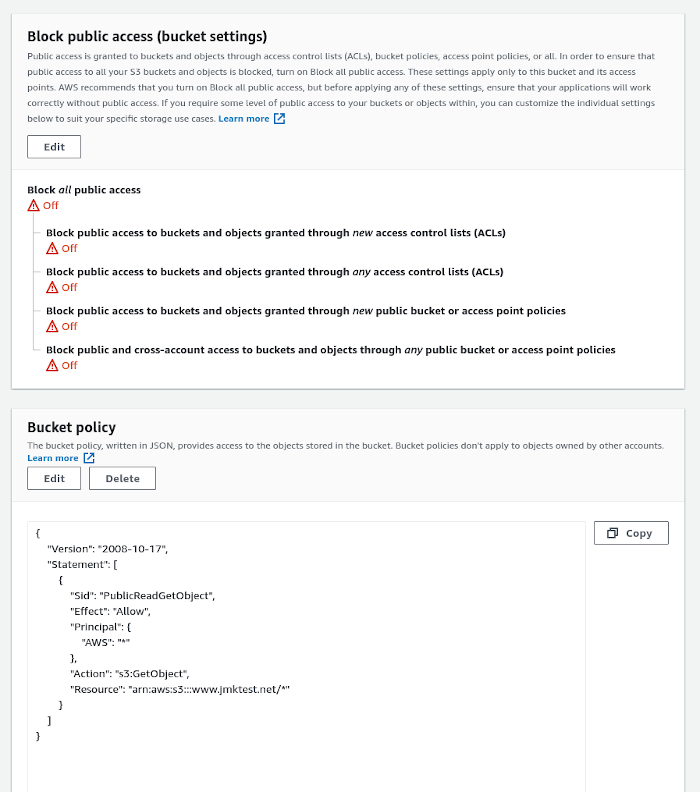
- made bucket publicly readable
- configured the bucket for static website hosting
- set the properties for the bucket
- made a naked domain S3 bucket (jmktest.net)
- set this bucket to just redirect to www.jmktest.net bucket
- using Route53, set up DNS record for www to point to the S3 bucket
- set up my jekyll site on my local computer
- uploaded my
_sitedirectory to the S3 bucket - tried out the site (not using https yet) to make sure it worked
- made a CloudFront Web distribution for the S3 bucket
- updated my DNS to point to this new CloudFront distribution
- used AWS Certificate Manager to request/create an SSL cert for www.jmktest.net, including jmktest.net as another name
- added the SSL cert to the CloudFront distribution
- now tried the site using https
This all looks straightforward, and I’ll show more details below, but it took me many tries to get it all to work. The dns and caching make it difficult to debug things quickly. I’m still not sure what I did to finally get it to work, which is why I am writing it all up here. Ideally I would do this all again, using a new domain, and make sure these steps all work…
the details
set up aws account
Following Kyle’s document, I signed up for an AWS account. This is called the “root” account. I added two-factor authentication (2fa) to the root account (see the IAM dashboard). Then I created a second user (again, see the IAM dashboard/Users) with two access types (Programmatic, AWS Management Console) and two policies (Admin Access, Billing). The second user account is the one we will use to do everything.
For the second user account we are given an AccessKeyID and a SecretAccessKey. We’ll save these for use with the awscli. I also set up 2fa for the second user account.
To use the awscli I first installed it on my ubuntu desktop with sudo pip3 install awscli, then ran aws configure and entered the access and secret keys.
Kyle’s document also walked me through setting up Billing Alerts and setting a billing alarm using CloudWatch.
register domain
For this example I registered the jmktest.net domain using AWS Route53. I didn’t write down all of the steps, but I think I just:
- searched for a unique domain name
- saw that it costs $11/year
- added my contact info
- bought the domain name
set up S3 buckets
Here we create the S3 buckets to store the html and css files for the website. We actually create two buckets, one for www.jmktest.net which stores the website files, and one for the “naked domain” jmktest.net that just redirects to the first bucket.
You can create these using the aws website, or using the cli:
aws s3api create-bucket --bucket 'www.jmktest.net'
After creating the bucket, enable “static website hosting” for the bucket (aws s3 website s3://www.jmktest.net/ --index-document index.html --error-document 404.html):

Also set the Bucket Policy to allow public read access. Lots of warnings here about public read access: anyone will be able to read what’s in this bucket, so don’t put anything in here that is private.
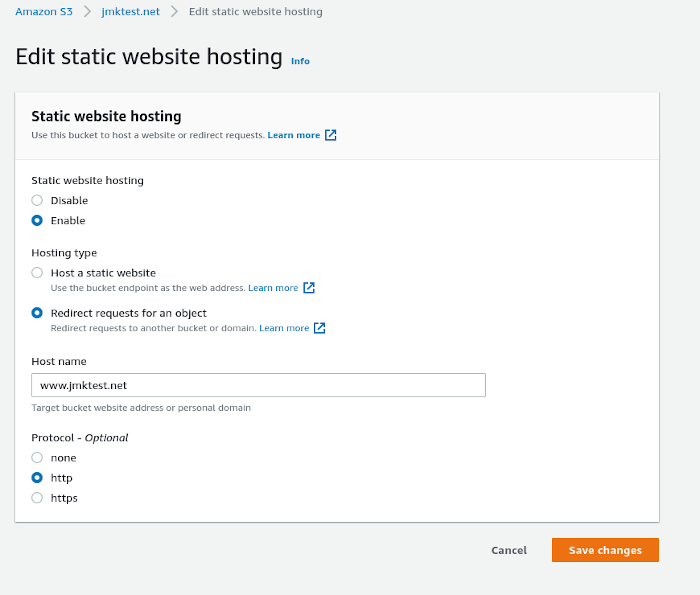
For the naked domain bucket, just create the bucket and then set up a redirect under Properties:
set up jekyll site
configure dns for buckets
set up CloudFront and ssl cert
still to do
- autodeploy to aws when I git commit/push
- optimize the distribution for caching??